Sometimes you just need to see things with fresh frozen eyes...
Yesterday, my uncle sent me a link to an article in The Washington Post about how spectacular Niagara Falls looks right now.
I have lived a short car ride away from the falls my entire life, and like many things that are in our own backyard, I have come to take the magnificence of this natural wonder for granted. Reading a national news article about it was just the wake-up call I needed. So, late yesterday afternoon the boys and I bundled up and headed north...
Now, I think I need to express how intensely I dislike cold weather... So much so, that when I asked Bob if we could go check out the frozen falls he said, "Who are you?!?" But, there is something about the start of a new year that makes me want to shake things up and get out of my comfort zone.
And, I'm so glad I did... The view was breathtaking!
(Literally. Record low temperatures combined with mist that freezes in the air and turns to mini-ice-daggers-that-stab-at-your-face will actually take your breath away! Hahaha!)
It turns out that once I got past the extreme cold,
I was left with some pretty remarkable inspiration...
Today I played with textures based on yesterday's view.
Things I experimented with:
- Scratching into the paper before applying a watercolor wash
- Using a glue stick, and white crayon as a resist (to keep white areas) before applying a watercolor wash
- Torn paper as relief
- Using torn paper edges as a "stencil" for pastel application
- Applying paint with plastic wrap
- Layering all of the different techniques
Happy New Year, Friends!
Whaaat? The subject line from an email I received today. (My name is not Jeff.) Hahaha!
It is probably no surprise that I've been doing some reflection the past few days. I love beginnings (especially the start of a new year)... but, as a recovering perfectionist I also have a tendency to put a lot of pressure on myself. This year, I've decided to approach 2018 a little differently...
My (very well-timed) fortune!
The new year is usually about putting your best foot forward and trying to fix imperfections... But now I'm wondering what if...
I decide to accept that life doesn't have to be perfect to be good?
I find a way to accept the wonky bits & maybe even enjoy them?
I share more? (Even the not-so-pretty stuff.)
Pulling back the curtain...
This is scary for me, folks. In a carefully curated internet world, it can appear that you're the only one who doesn't have it all together. As I write this and commit myself to sharing more, I feel nervous. But... I'm hoping that you can relate to my desire for authenticity, and that you'll join me as I journey into 2018 (messy parts, and all)!
p.s. I have decided to *try* and share something about what I'm up to every day (Creative Every Day style). In order to take some of the pressure off and set myself up for success, I've decided to keep my post titles simple to reduce "decision fatigue".
p.p.s. You can click here for an article I found very interesting about "decision fatigue" and "the science of simplicity"
Congratulations and LOTS of Love to
my friend and Paint Party Friday co-parent, EVA!
Time flies when you're having fun...
It's hard to believe our blog baby is already 6 years old!
To my painting & partying friends,
Thank you for helping to make PPF such a fun community!
(Please be sure to stop by the Paint Party Friday blog because
we're having a giveaway.)
Eggquiring minds want to know...
Did I come up with 30 ideas in 30 days for Storystorm?
Yes! I actually came up with 46! Woo-hoo!
(I know there are some stinkers in the bunch, but there are definitely some I'm looking forward to working on.)
Did I write the first draft for a new picture book for 12x12?
Yes! (I also revised an old manuscript that I had set aside for years!!!)
Did I create a new picture book dummy?
No. But... I did work on a number of new illustrations.
So far, so good...
The challenges seem to be keeping me on track!
(I'll keep you posted...)
Happy New Year, Friends!
I hope your year is off to a good start and that you are having
lots of fun and productive studio time!
For me, the new year means lots of new characters and lots of new ideas! (It also meant an explosion of masking fluid in my studio that led to an hour long clean-up and nearly having to cut my hair... Have you ever tried to get masking fluid out of a paintbrush? If you have, then I'm sure you can imagine my near hair catastrophe! Hahaha!)
I digress... Back to the new ideas...
In addition to the super fun projects I am already working on, I signed up for the Storystorm (previously PiBoldMo) challenge!
The goal is to come up with 30 new picture book ideas in 30 days. I have to say, inspiration is flying because we are about halfway through the month and I am already at 30 ideas! (Some good, some not-so-much, but at least the inspiration faucet is on.)
I plan on putting some of those ideas to use in another challenge I signed up for: 12x12. The goal of the 12x12 challenge is to write 12 picture book manuscripts in 12 months. (I am giving myself the additional challenge of turning those manuscripts into roughly illustrated dummies... Wish me luck!)
I'll be sharing my progress here, so please check back soon...
In the meantime, I'll be in my studio
(trying to keep the mess to a minimum)!
Since I love seeing how other artists create,
I thought it would be fun to share my illustration process
from start to finish...
My process always begins with sketching. At this stage, I'm trying to get a feel for the character(s), the movement, and the expressions. I also like to try and develop a rough plan for the layout of the page(s).
Next, I create more finished drawings based on my original sketches, but making adjustments as needed. I create these drawings on plain old copy paper (but in the size the final artwork will be in).
After my my layout is set and my drawings are complete, I use my light box to trace my drawings onto 140lb. watercolor paper. When my original drawings have been transferred, I use a dark brown prismacolor pencil to lay in my underlying values. (I want to get a base down so that I can see where darks, lights, shadows, and highlights will go.)
When I finish my colored pencil layer, I cover the images with clear gesso and let that dry. Then, I put on a wash of burnt sienna fluid acrylic. This layer adds warmth and depth to the final painting that would be difficult to achieve if I left those areas white.
Now the fun really begins... I start adding color (using acrylic paint). I start by painting the areas that would be furthest away (in the background), then moving to areas that are closer to the viewer (in the foreground).
I build up my paint in layers, starting with darker values and gradually lightening them. Not only does this allow for smooth blending, it gives the final painting more depth.
(It was at this point that I accidentally dipped my sleeve into my palette and smeared it across the page as I was working.
I don't recommend that! Hahaha!)
When I'm adding color, I try to avoid using paint straight from the tube. I use a porcelain enamel butcher's tray palette and mix my paints directly on the smooth surface. Once I've mixed my colors, I transfer them to folded damp paper towels. (This keeps them workable for a long time.) If I spritz my paints with water and cover my palette with plastic wrap, I can use the paints I've mixed for days. (Also, the porcelain surface is great for easy clean-up!)
I keep building on previous layers, moving around the painting (avoiding working on any one particular area for too long). The final step is to add the last little details and the whitest whites.
(Actually, the final step for this painting was fixing my "oops" paint smear digitally!)
I hope you've found this start to finish look at my illustration process helpful...
See you in 2017!
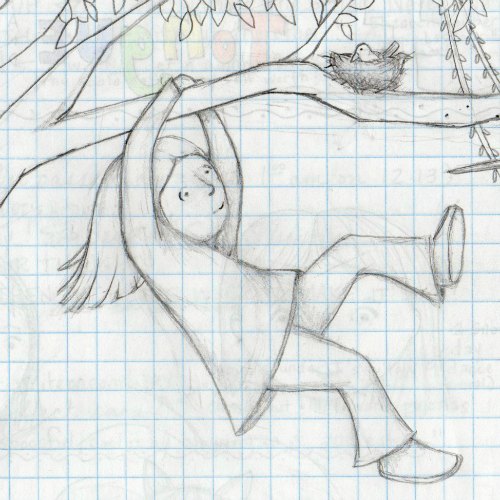
Last week I teased you with a quick gestural sketch.
These are the paintings the sketch led to...
Do you love to see how an artist creates their art? Me too!
That's why next week I will be sharing my process (in detail, with pictures)
from sketch to finish!