Showing posts with label In the Studio. Show all posts

Friday, April 17, 2020

The 100 Day Project: Days 1 - 10


I've joined #The100DayChallenge! If you're on Instagram and would like daily updates, you can follow my progress @kristindudish. I also thought it would be fun to share the project in groups of 10 here on the blog. The theme I've chosen is #100DaysofPartyAnimals. 


1/100: Well, there is certainly no moosetaking that Clark is the life of the party!


2/100: Coco's pre-party preparations may have led to some overly enthusiastic color choices... The (possibly) good news? Her normal skunky aroma (off putting to some) has been overshadowed by the distinct smell of hair dye.


3/100: Laverne never shows up to a party empty handed, and her blue ribbon square pie is always a crowd pleaser.


4/100: Just when you thought it was safe to go back in the water... This is the start of my next party animal. (Pool party, anyone?)


5/100: Pete was so excited to have actually been invited to a pool party, he may have gone a bit overboard in his preparations.


6/100: As an expert in a different holiday, Jerry was excited to be invited to a Halloween party. Unfortunately, his costume making skills were not nearly as advanced as his egg decorating talents.


7/100: A scribbly sketchy start of an idea.


8/100: Binkwee loves book birthday parties, and he is extra excited about ANTI/HERO written by the fabulous Kate Karyus Quinn and Demitria Lunetta with amazing art by Maca Gil! Happy Pub Day!


9/100: "Masquerade", acrylic on fabric (attached to an old cabinet door), 2011. One of the things I've been doing during quarantine is cleaning (and trying to organize) my studio. While going through a closet, I discovered this "party animal" that I painted in 2011... I'm thinking I may need to create an updated version for The 100 Day Challenge.


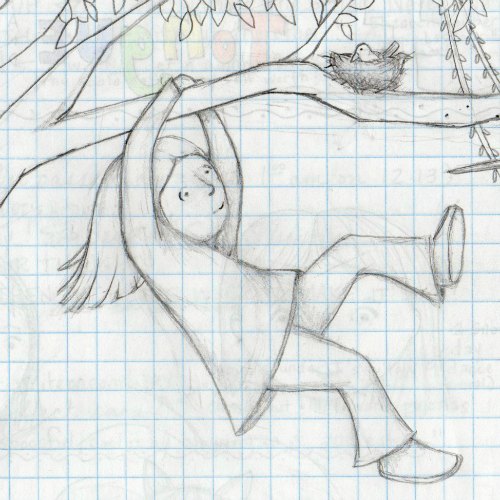
10/100: Playing with an idea inspired by yesterday's post...


Please be sure to let me know if you're doing the challenge too - I'd love to see what you've been creating for it!


Friday, May 11, 2018

2018: 125-131/365


In my last post I mentioned that I took part in the Illustrator Challenge at the New England SCBWI Conference.  The theme of the challenge was Fairy Tale Mash-up, so I created "Swinederella": a combination of Cinderella, The Three Little Pigs, and a dash of Little Red Riding Hood.  It was created using pencil, watercolor, and Photoshop.

Since I love seeing how other artists create their art, I thought it would be fun to share images of my process from start to finish...

1. Thumbnail Sketch


2. Character Design


3. Clean Sketch


4. Watercolor Washes


5. Black & White Underpainting


6. Starting to Add Color


7. Final Image (after many, many layers!)


I'm still figuring things out in Photoshop, but I have a feeling that I'm really going to enjoy this way of working!

Tuesday, April 17, 2018

2018: 107/365

(And, the snow keeps on falling...)

I don't think whoever coined the phrase,
"April showers bring May flowers."
meant snow showers.

Ugh.

Friday, March 2, 2018

2018: 61/365


Yesterday afternoon, from this same window, I could see the grass.
But... To be completely honest, by Buffalo standards this really isn't that bad.
Or, in the famous words of one of my favorite children's books 
from when I was little...

(That's me on the left.)


Wednesday, February 21, 2018

2018: 52/365


I'm still working like crazy on polishing my big project.
Although I can't reveal the whole thing, I wanted to give you a little peek.

As I was reworking & revising this page I was reminded of 
a quirky painting I did way back in 2012 just for fun...


I guess it's true that no time spent doing what you love is ever wasted!
(This octopus must have been floating around in my brain
just waiting for the chance to resurface.)


Thursday, January 18, 2018

2018: 18/365


I often joke that if brushes could talk, mine would scream!  Sometimes they sit in water for weeks, some of them sit in water that eventually dries up, they get crusty...  To say that I am hard on them is quite an understatement.  Today, I'd like to let you in on a brush-saving secret...


I have been using this brush cleaner since art school, and it is amazing... Brushes that I thought were goners are miraculously transformed!  Because of this product, I still use a few brushes that I bought almost 20 years ago!
(I am not getting paid to say this, I just wanted to share.)

Do you have any products you can't live without?


Tuesday, January 2, 2018

2018: 2/365

Sometimes you just need to see things with fresh frozen eyes...


Yesterday, my uncle sent me a link to an article in The Washington Post about how spectacular Niagara Falls looks right now.
I have lived a short car ride away from the falls my entire life, and like many things that are in our own backyard, I have come to take the magnificence of this natural wonder for granted.  Reading a national news article about it was just the wake-up call I needed.  So, late yesterday afternoon the boys and I bundled up and headed north...


Now, I think I need to express how intensely I dislike cold weather... So much so, that when I asked Bob if we could go check out the frozen falls he said, "Who are you?!?"  But, there is something about the start of a new year that makes me want to shake things up and get out of my comfort zone.  
And, I'm so glad I did... The view was breathtaking!  
(Literally.  Record low temperatures combined with mist that freezes in the air and turns to mini-ice-daggers-that-stab-at-your-face will actually take your breath away!  Hahaha!)


It turns out that once I got past the extreme cold,
I was left with some pretty remarkable inspiration...
Today I played with textures based on yesterday's view.


Things I experimented with:
- Scratching into the paper before applying a watercolor wash
- Using a glue stick, and white crayon as a resist (to keep white areas) before applying a watercolor wash
- Torn paper as relief
- Using torn paper edges as a "stencil" for pastel application
- Applying paint with plastic wrap
- Layering all of the different techniques

Friday, January 13, 2017

Happy 2017!


Happy New Year, Friends!
I hope your year is off to a good start and that you are having 
lots of fun and productive studio time!


For me, the new year means lots of new characters and lots of new ideas!  (It also meant an explosion of masking fluid in my studio that led to an hour long clean-up and nearly having to cut my hair... Have you ever tried to get masking fluid out of a paintbrush?  If you have, then I'm sure you can imagine my near hair catastrophe! Hahaha!)

I digress...  Back to the new ideas...


In addition to the super fun projects I am already working on, I signed up for the Storystorm (previously PiBoldMo) challenge!  
The goal is to come up with 30 new picture book ideas in 30 days.  I have to say, inspiration is flying because we are about halfway through the month and I am already at 30 ideas!  (Some good, some not-so-much, but at least the inspiration faucet is on.)


I plan on putting some of those ideas to use in another challenge I signed up for: 12x12.  The goal of the 12x12 challenge is to write 12 picture book manuscripts in 12 months.  (I am giving myself the additional challenge of turning those manuscripts into roughly illustrated dummies... Wish me luck!)


I'll be sharing my progress here, so please check back soon...
In the meantime, I'll be in my studio 
(trying to keep the mess to a minimum)!

Monday, December 26, 2016

My Illustration Process: From Start to Finish!


Since I love seeing how other artists create, 
I thought it would be fun to share my illustration process 
from start to finish...


My process always begins with sketching.  At this stage, I'm trying to get a feel for the character(s), the movement, and the expressions.  I also like to try and develop a rough plan for the layout of the page(s).


Next, I create more finished drawings based on my original sketches, but making adjustments as needed.  I create these drawings on plain old copy paper (but in the size the final artwork will be in).


After my my layout is set and my drawings are complete, I use my light box to trace my drawings onto 140lb. watercolor paper.  When my original drawings have been transferred, I use a dark brown prismacolor pencil to lay in my underlying values.  (I want to get a base down so that I can see where darks, lights, shadows, and highlights will go.)


When I finish my colored pencil layer, I cover the images with clear gesso and let that dry.  Then, I put on a wash of burnt sienna fluid acrylic.  This layer adds warmth and depth to the final painting that would be difficult to achieve if I left those areas white.


Now the fun really begins... I start adding color (using acrylic paint).  I start by painting the areas that would be furthest away (in the background), then moving to areas that are closer to the viewer (in the foreground).  
I build up my paint in layers, starting with darker values and gradually lightening them.  Not only does this allow for smooth blending, it gives the final painting more depth.

(It was at this point that I accidentally dipped my sleeve into my palette and smeared it across the page as I was working. 
I don't recommend that!  Hahaha!)


When I'm adding color, I try to avoid using paint straight from the tube.  I use a porcelain enamel butcher's tray palette and mix my paints directly on the smooth surface.  Once I've mixed my colors, I transfer them to folded damp paper towels.  (This keeps them workable for a long time.)  If I spritz my paints with water and cover my palette with plastic wrap, I can use the paints I've mixed for days.  (Also, the porcelain surface is great for easy clean-up!)


I keep building on previous layers, moving around the painting (avoiding working on any one particular area for too long).  The final step is to add the last little details and the whitest whites.

(Actually, the final step for this painting was fixing my "oops" paint smear digitally!)

I hope you've found this start to finish look at my illustration process helpful...
See you in 2017!

Friday, October 11, 2013

Out Of My Comfort Zone

A page from my sketchbook.

As a birthday present to myself, I signed up for 
Flora Bowley's Bloom True e-course.

For those of you that have been reading my blog for a while, you probably already know that I am most comfortable painting faces...


And silly things...

"Cinderellephant"

But, the reason I chose to take Flora's class was not do something comfortable and familiar. Or, to have an excuse to clean and organize my studio (although, it was nice to see it that way for a little while)...


The reason I signed up for "Bloom True" was to learn something new.


When I was in art school (many years ago), I was taught to think, plan, explain "why", and then think some more... While I was sketching ideas and carefully planning compositions, there wasn't a whole lot of room left for "go with the flow".


Please don't get me wrong, I learned many valuable things in art school.  But...
I also believe that there are always new lessons to be learned.  And right now, the lesson I need to learn is how to loosen up...


 Luckily for me, Flora is a gentle and encouraging teacher who says, 
"There are no mistakes."


As a recovering perfectionist, letting go is a challenge.
But, if I can get out of my own way, I have a feeling I'll learn a lot about myself (and my art) through this process.

p.s. Even though I work with EVA weekly to make sure Paint Party Friday is up & running, it's been ages since I actually linked a post of my own... I think it's about time!


LinkWithin

Related Posts Plugin for WordPress, Blogger...