Showing posts with label Tutorial Try-Outs. Show all posts

Friday, March 7, 2014

The "Unselfie" Project: Process Pictures & Questions Answered


The response to The "Unselfie" Project has me excited, nervous, thrilled, anxious, giddy...  All good things, I think, when you're working on something new and something you're passionate about.  In addition to observations and critiques, I have been receiving lots of questions through comments, messages, emails, and phone calls!  I love the questions because they challenge me to focus on my intent and provide me with an opportunity to see things through the viewer's eyes.
So, since there are many questions that keep popping up, I thought it would be a good idea to put the answers to the "frequently asked" all in one place...
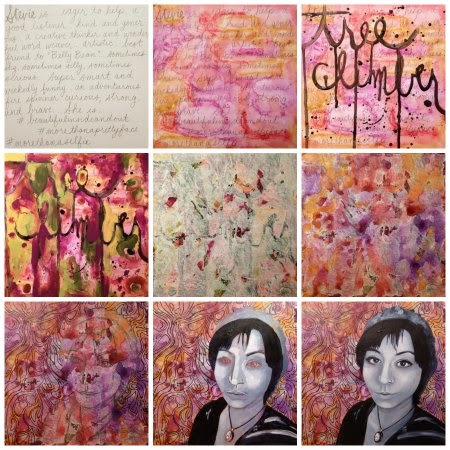

The layers of "Stevie"

What is The "Unselfie" Project?  
How did you come up with this idea?
The "Unselfie" Project is:
The unselfish desire to see beyond the "selfie"... To learn more about the layers of personality behind the photo.

This project was born from the idea that everyone wants to be seen, not just looked at, but really seen.  This project is a way for me to combine my passion for painting with my passion for kindness.


The layers of "Casey"

Where do these faces come from?
With a few exceptions, the faces come from "selfies" that were posted to either instagram or facebook.  (I also feel it's important to mention that I ask permission to paint their picture.)

How do you come up with the words that go with the paintings?
The words are a very important part of the project, they work in tandem with the painting.  People are so much more than what you see on the outside, or in a single photo.  The words describe the things you may not be able to see, but that are (some of) the qualities that make the person unique beyond their physical being. 


The layers of "Lisa"

What size are these paintings?  Are they on canvas?  What is your technique?  What medium do you use?  How do you create your backgrounds?
All of these paintings begin on an 8" x 8" square piece of 140lb. watercolor paper.

I begin each "unselfie" by writing (with an ordinary graphite pencil) about the person who I am painting.  It is a way for me to set my intentions for the piece, and they are the same words that accompany the finished painting.  After I am finished writing, I start adding some colors that remind me of the person (usually with watercolors or watercolor crayons).  Then I start playing while still thinking about the person... Just as each person is unique, so is the process.  Some of the techniques I use in my background layers include:  drippy writing (of more words inspired by the person), finger painting, stamping and stenciling (I like to cut my own stamps and stencils whenever possible), collaging papers that mean something, more painting...  I just like to build up lots of layers.

The face is painted using shades of paynes gray (acrylic).  When I paint a face I start with a quick sketch (in graphite if the background is light, or white charcoal pencil if the background is dark).  Then, I roughly paint in the values using a (fairly wide) flat brush.  I keep going back in with successively smaller and smaller brushes until I'm finished.  (Adding detail to the eyes is always the very last thing I do.)


The layers of "Patience"

What is the point of creating so many layers if you just cover them up anyway?
I love this question!  The layers add depth, both literally and figuratively, to each painting.  Just like it takes many layers of personality to create a whole person, it takes many layers to create each painting... Sometimes the layers peek through and you get a glimpse, other times the layers are hidden beneath the surface...


The layers of "Jenny"

Why aren't the faces in color?
When I was in college (many years ago!), I was taught that paintings should start with an underpainting (a monochromatic value study).  My professors explained that the better the underpainting, the more depth the subsequent painting would have.  We always added color, sometimes limited color, but we always added color on top.

It wasn't until very recently that I realized there is a beauty in the underpainting all on its own...  And for this project, leaving the underpainting "as is" seemed very appropriate...  The "exposed" portrait in shades of gray set against the vibrant background layers creates a contrast that adds even more depth to each painting.


Thank you so much for all of your comments (and questions!) about my paintings... I am so excited about this project, and all of your interest helps keep me motivated!

Tuesday, May 28, 2013

Tutorial Try-Out: DIY Paint By Numbers


This week's tutorial try-out was:

For this tutorial, I decided to do a funky self-portrait.  I started with a photo that I use as my facebook, instagram, pinterest, goodreads (etc....) profile pic.  (You can also see it tucked into the lower right corner of my blog header.)

It's a pretty goofy photo to start with, so it really wasn't a surprise that I ended up looking like a clown trapped in a lava lamp!

The results were fun, the technique was easy...
All-in-all, I'd say it was a great way to finish off Tutorial Try-Outs!

Did you try this tutorial?
If so, please link up below.
(I can't wait to see!)


And, just in case you've missed any of the tutorials I've tried out, you can view the full list here.


Kristin Dudish

Tuesday, May 21, 2013

Tutorial Try-Out: Teesha Moore's Fun Drawing Lesson


This week's tutorial try-out was:

If you have ever stopped by Teesha Moore's blog, then you know that she is wildly creative and a powerhouse of inspiration!  
When I stumbled upon her fun drawing worksheet, I knew I'd have to give it a try...

A page from my sketchbook.

One of the questions I am most often asked is, "What in the world were you thinking?" "Where do you get your ideas?".  So, I thought it might be fun to give you a step-by-step look into what was going through my head as I played with Teesha's drawing worksheet in my sketchbook... 

1. Actually, not a whole lot was going through my head at this point... I just thought she looked like she needed a bird's nest on her head.
2. The bird's nest made me think of cats (hungry for birds, of course), and I thought that this drawing style would probably be 
pretty cool for a cat face.
3. I started thinking about other things cats eat, but at the same time I was thinking about my crazy haired ladies and how this technique might translate into one of them.
4. I realized that although there were some fish in the last drawing, I still hadn't satisfied my need for drawing fish.  While I was drawing them, I started thinking about the fish in 
Monty Python's "The Meaning of Life".

Well, basically that's a quick glimpse into my typical train of thought.  One thing leads to another... 
Sometimes it makes sense, sometimes it doesn't...
Aren't you completely horrified and disappointed glad 
that you asked?!?


After I finished this page in my sketchbook I thought, "These would be fun coloring pages".  So, this morning I printed out some copies and started playing!

Did you try this tutorial?
If so, please link up below.
(I can't wait to see!)

And, please be sure to read all the way to the bottom of this post for next week's tutorial!

Next week is the last Tutorial Try-Out (for now).  
In honor of that, I chose a tutorial that is similar to (but different from) what appears to have been the most popular tutorial (Easy Watercolor Portraits from 4-23-2013).

Next week's tutorial is:
The Ambitious Procrastinator's DIY Paint By Numbers

**a note about next week's tutorial:**
In her tutorial, Nikki uses the photo editing program picnik.
Picnik is no longer available, but you can substitute the free online program picmonkey instead.  
(Just be sure to use the "focal soften" tool.)
Picmonkey is available for free here.

Kristin Dudish

Tuesday, May 14, 2013

Tutorial Try-Out: Geometric Painting


This week's tutorial try-out was:

(Here is an update from her blog with her (mostly) finished painting.)

Before the micron pen was added.

This tutorial made me think of chameleons and the way they hide in plain sight.  So, it only seemed natural to start by drawing a couple of quick chameleons.  Then, instead of using standard geometric shapes, I drew leaves all over the page.  I already had some small jars of house paint open in my studio for another project, so I decided to use those colors for the painting.  (Plus, the house paint only requires a single coat for a solid finish, so that's a bonus!)  After I finished the painting, I wanted to bring back the lines, so I used a micron pen (05 size) along the edges...

Before and After

Did you try this tutorial?
If so, please link up below.
(I can't wait to see!)

And, please be sure to read all the way to the bottom of this post for next week's tutorial.


Next week's tutorial looks like fun:

Kristin Dudish

Tuesday, May 7, 2013

Tutorial Try-Out: A Lynne Hoppe Inspired Face (And An Announcement)

(I used supplies I already had in my studio... there were a few substitutions.)

This week's tutorial try-out was:
Lynne Hoppe's How to Paint Faces tutorial

As I mentioned at the end of my last post, I am a big fan of Lynne Hoppe.  I love her style... The softness, loose lines, and limited palette intrigue me.  I was very excited to (finally) give her "how-to" a try...


As much as I loooove Lynne's work, I didn't want to create a copy.  I was interested in seeing how her technique and palette might translate into my own work.  I was also hoping that doing this technique might help me loosen up a little...  I have a tendency to get caught up in details (and frequently over-work pieces), so I thought Lynne's soft style might give me some insights into how I can improve as an artist.

I think I did learn quite a bit by doing this tutorial, 
and I will definitely be tucking away some of my new-found understanding for use in later projects.

Did you try this tutorial?
If so, please link up below.
(I can't wait to see!)

And, please be sure to read all the way to the bottom of this post for next week's tutorial and an important announcement!


Next week's tutorial was suggested by NatashaMay:
Denthe's Geometric Painting Technique

Now, for the announcement:

Summer is fast approaching, and so are some challenges that I love to participate in!  Since I'm planning on playing along with Daisy Yellow's Index Card A Day (from June 1st to July 31st), Twinkle Twinkle's Summer Of Color, and Rhi-Creations Doodle-A-Day, May 28th will be my last Tutorial Try-Out (for now...).

Kristin Dudish

Tuesday, April 30, 2013

Tutorial Try-Out: Abstract Face


This week's Tutorial Try-Out was 
"How to Paint Abstract Faces" by raeart.
I have to admit I am so glad I chose a quick, splashy, and fun one for this week, because I had very little time for experimenting this week.

Spring has a tendency to turn me into a restless, easily distracted tornado.  Case in point:  This week I painted and tiled a bathroom (and that's only the beginning of my current DIY mania)!  So, since I am up to my eyeballs in home projects, I was happy to have a satisfyingly simple tutorial to try-out...


I think I would like to go back into this with some watercolor crayons and gesso, but that will have to wait... 
Today I'm tackling a project in Tyler's room!

Did you try this tutorial?
If so, please link up below.
(I can't wait to see!)

And, please be sure to read all the way to the end of this post to see what tutorial I'm trying next!


I am a huge fan of Lynne Hoppe, and her face painting how-to has been one of the tutorials at the top of my list for ages, 
so I figure there's no time like the present...
Lynn Hoppe's "how to paint faces" tutorial.


Kristin Dudish

Tuesday, April 23, 2013

Tutorial Try-Out: Easy Watercolor Portrait


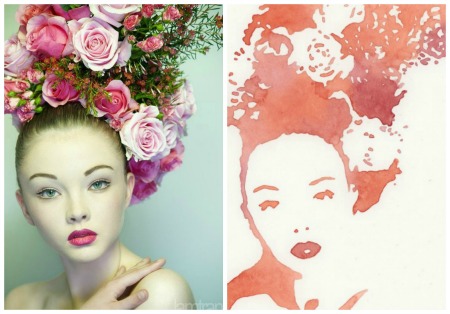
I would like to start this post by thanking Carmen for suggesting I try out the Easy Watercolor Portrait tutorial at the Grow Creative blog.  It was simple, straightforward, and lots of fun...

I found the photos on pinterest. (Here, here, and here.)


I think the results were pretty cool, but I'm still playing.
(I have a feeling these watercolor portraits are just the beginning of something more...)

Did you try this tutorial?
If so, please link up below.
(I can't wait to see!)

And, be sure to read all the way to the end of this post to see what tutorial I'm trying next!


I found the next tutorial on YouTube, and since we're in portrait mode, I thought it might be fun to splash some more paint around for:
How to Paint Abstract Faces by raeart

Kristin Dudish

Tuesday, April 16, 2013

Tutorial Try-Out: Gelatin Printing


I am so glad that I finally tried gelatin printing thanks to Karen's post (and Linda Germain's site too)!


This was so much fun, and I think there are so many possibilities - this is definitely something I'll be doing more of!


(I think having a place to spread out is probably a plus!)


The results I got using Jessica Sporn's "Flying Tulips" stencil were pretty cool (it ended up looking like fabric).
Please be sure to stop back on Thursday - I'll be sharing more of the art I've made using Jessica's stencil, as part of her "test drive" blog hop.

Did you try this tutorial?
If so, please link up below.
(I can't wait to see!)

And, be sure to read all the way to the end of this post to see what tutorial I'm trying next!


Carmen suggested we try:
Grow Creative's Easy Watercolor Portrait Tutorial
Looks like fun to me...
So, let's give it a go!

Kristin Dudish

Tuesday, April 9, 2013

Tutorial Try-Out: Glue Collagraph

A Mommy-Tyler Glue Collagraph Collaboration

If you read my last post, then you know that Tyler was on Spring Break last week. So, for this week's tutorial try-out (Belinda Del Pesco's Glue Collagraph Tutorial), I had a helper...


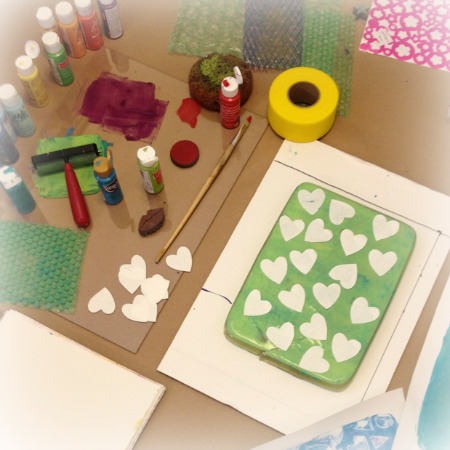
Tyler drew pictures (using a sharpie marker) on matboard that was coated with gloss varnish.  I traced his drawings using Elmer's glue, straight from the bottle.


We let the glue dry overnight, then the next day we inked our plates using a brayer and Speedball water soluble black ink. (We printed the images on 140 lb. watercolor paper.)


When I was in college, the "second pull" was always my favorite, so we were sure to create "ghost prints" too!

(This was a lot of fun, and I'll definitely be doing it again, but I think I'm going to try different glues to see if I can find one that isn't as runny.)

Did you try this tutorial?
If so, please be sure to link up below.
(I can't wait to see!)

And, be sure to read all the way to the end of the post to see what tutorial I'm trying next!


It seems I've been bitten by the printmaking bug, so next week I'll be trying out a tutorial that has been at the very top of my list ever since I saw my friend Karen creating lots and lots of beautiful gelatin prints.
Gelatin Printing Using A Homemade Block by Karen at I am Rushmore

I am very lucky to have received a super fun zine from Karen that describes how to make a gelatin block in great detail.  But, I realize that not everyone knows how to make a gelatin block, so here is a link to a site that has directions (and answers many other gelatin related questions too):
Linda Germain's Gelatin Printing

Kristin Dudish

Tuesday, April 2, 2013

Tutorial Try-Out: Glue As A Resist


This weeks tutorial, "Glue As A Resist" at Unruly Paper Arts, started off as a pretty straightforward process...


I did my first page using glue applied straight from the bottle (and watercolor once the glue was dry).  I guess I was still feeling a bit inspired by last week's tutorial, because I decided to add some gesso to help define leaf shapes.

I liked the results, but using glue straight from the bottle created a raised texture, and I was interested in seeing if I could create a resist that was flat...


For my next page, I applied the glue with a brush.  Success!  The "leaf veins" I had drawn completely disappeared when they dried.  When I applied the watercolor to the page, they magically appeared again!  I decided to add some micron & gel pen details, and some panpastel shading too.

This technique really got the wheels turning in my mind, and I thought since the images painted with the glue completely disappear, it would be really cool to create...


Top secret messages!

Well, with an idea that fun, I had to let my favorite little collaborator in on the "secret"!  Tyler and I have been playing with this magical technique ever since...


One of Tyler's "Secret Messages" That I Revealed With Watercolors


One of My "Secret Messages" That Tyler Revealed With Watercolors

Did you try this tutorial?
If so, please be sure to link up below.
(I can't wait to see!)

And, be sure to read all the way to the end of this post to see what tutorial I'm trying next!


Since the glue is already out, I thought it would be fun to try:
Belinda Del Pesco's Glue Collagraph Tutorial.

Kristin Dudish

Friday, March 29, 2013

One Thing Leads To Another...


Natasha left a comment on this week's tutorial post:
"I love this opportunity to play with no expectations!"
Well, I have to say that I couldn't agree more!

Since creating my first abstracted flowers, I've continued to play...


And, since one idea always seems to lead to another...
I decided to use this opportunity to face a big fear of mine:  Digital Art.

Since I am usually a tactile-hands-on-paint-all-over-myself kind of gal, I have always been apprehensive (though, completely intrigued) about digital art.  I see so many artists who create beautiful (and very painterly) digital pieces, but I have remained intimidated by the process... 


Until now.

I used Carla's low-pressure, no-expectations tutorial as inspiration for my very first digital doodle!


And, once I created the flowers, I couldn't help but turn them into crazy hair.
(Crazy-haired ladies seem to have become a bit of an obsession of mine... But, that's a story for a different post!)


Tuesday, March 26, 2013

Tutorial Try-Out: Abstracted Flowers


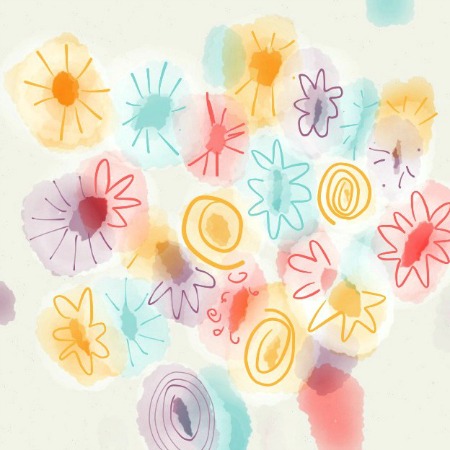
This week, by Sandra's suggestion, I tried-out Carla Sonheim's Abstracted Flowers Tutorial.


A page in my sketchbook.

It's no secret that I'm a huge fan of Carla, and this tutorial is no different... I had lots of fun playing with my watercolors and gesso!

I decided to take this tutorial a little bit further, and incorporate the "flowers" into one of my drawings...


Be sure to stop back later this week when 
I share the finished drawing/painting.
(I know, I know, I'm totally being a tease... 
I don't normally do "cliffhangers", 
but I thought some suspense might be fun for this post! Ha!)

Did you try this tutorial?
If so, please be sure to link up below.
(I can't wait to see!)

And, be sure to read all the way to the end of the post to see what tutorial I'm trying next!


Now, for next week...
When Jez suggested this tutorial from Unruly Paper Arts,
I couldn't "resist"!
(Pun intended - I'm feeling quite silly today!)

Glue As A Resist Tutorial from Unruly Paper Arts

Kristin Dudish

LinkWithin

Related Posts Plugin for WordPress, Blogger...